PhD, site expert.
A classic is considered to perform repair work from top to bottom: ceiling decoration, gluing or painting walls, floor installation. Russians traditionally do the opposite: start from the floor, and end with the ceiling. However, there is a situation here, where neither the professionals nor the apartment owners know for sure what, first, wallpaper or stretch ceiling.
Why do priority problems arise?
Discussed among professional builders and customers, the question "When to stretch the ceiling: before wallpaper or after?" largely contrived. This is due to the fact that these types of finishes are performed by various groups of builders. The walls are covered with master finishers, the suspended ceiling (not to be confused with the suspended - these are different types of ceiling finishes) is installed by the installers.
None of them want to make every effort so as not to damage the work of the previous team: when installing the ceiling, there is a risk of contaminating already pasted wallpapers, when wallpapering, tearing or smearing the stretched film into glue.

In both cases, contaminated finishing materials are very difficult to clean, but most likely impossible. In addition, installers are trying to prove that under the influence of high temperature from the operation of the gas gun, wallpaper sheets can warp or simply lag behind the wall, so they have the advantage of performing their operation.
If the repair is carried out by a single contractor (one company or team), the problem of what used to be wallpaper or stretch ceiling is generally removed from the agenda, which will be discussed at the end of the article. When working with different teams, the sequence of operations (first the stretch ceiling, then the wallpaper or vice versa) is determined by various factors:
- trellis view
- type of wall
- the method of tensioning the panel,
- kind of materials for a false ceiling.
Priority Nuances
Currently, teams of finishers and installers in almost the same number of cases start work first. This is explained by the fact that the team that arrived at the apartment first, first and foremost, performs its work.
In practice, there has never been a case when arriving finishers offered customers to first install a stretch ceiling, and then wallpaper. This promise applies to installers. To understand who is right in the dispute, we will analyze from the position of each group of specialists the positive and negative aspects of both sequences of finishing work.
The opinion of the finishers is first the walls, then the ceiling space.
First the wallpaper, and then the ceiling
The technology with the arrangement of a stretch ceiling after gluing tapestries is actively upheld by the finishers. At the same time, they reinforce their point of view with economic calculations - the newly installed finishing material risks being replaced due to damage or contamination. Therefore, more expensive material should be put in the second place, and this is a PVC film or fabric, which is even 1.5-2 times more expensive.
The advantages of this order include:
- the safety of the stretched ceiling from mechanical damage with a spatula or knife during cutting of the top of the trellis,
- no risk of contaminating the stretched film (fabric) with glue, liquid wallpaper, dyes (wallpaper for painting) or with a solvent,
- the top of the wallpaper hidden under the baguette, which increases the aesthetics of the pasting,
- the ability to continue work immediately after the previous operation.
The disadvantages include:
- pollution of wallpaper sheets with dust when drilling holes for dowels in the wall - using a punch in combination with a construction vacuum cleaner does not completely remove the problem - there is dirt, but in less quantity,
- the risk of damage to the wallpaper while refueling the canvas under the baguette,
- exposure to vinyl wallpaper when exposed to heat guns lose their original appearance,
- the need to stop work for 6-7 days for the complete drying of the wallpaper,
- the ability of some types of wallpaper to peel off when there is a sharp change in the temperature regime in the room - under the influence of high temperatures (up to 80 degrees), some types of glue change their molecular structure and stop holding the tapestry paintings on the wall,
- difficulties in cutting the top of the wallpaper when they are removed from the wall during replacement - any careless movement of a spatula or knife can damage the stretched fabric.
Installers believe - first installing the ceiling, then gluing the wallpaper.
First, the ceiling, and then the walls
In conditions when the top is set first, and wallpaper needs to be glued in the second place, there are also positive and negative sides.
- the ability to remove dust from drilling holes when attaching a baguette without damaging the wallpaper - they are not yet glued,
- lack of consequences from the operation of the heat gun,
- the ability to immediately begin gluing trellises.
- the risk of damage or contamination of the ceiling during the decoration of the walls, which will lead to significant material losses.
With this technology, the operation algorithm is as follows:
- on the prepared surface the frame is fixed under the ceiling canvas,
- pull the cloth
- install plugs and moldings (baseboard),
- glued trellis.
Of the arguments given by professionals, it is still incomprehensible - the stretch ceiling after wallpapering or before.
We emphasize - this is from the point of view of builders, finishers and installers. They, in our opinion, are subjective, which will be discussed below.
Who has more powerful arguments
In their arguments, builders developed a system that determines the order of work. In their opinion, when the owners choose bright wallpaper, the risk of contamination when drilling the wall tends to 100%.
Therefore, the wallpaper should be glued after installing the ceiling. But this drawback is not really such - the wall can be covered with plastic wrap, securing it with tape on top. After installing the baguette (not the ceiling), the screws are released a little, and the film is easily removed (after removing the film, the hardware is screwed in until it stops).
The same applies to vinyl wallpapers - they can also be covered with a film from the effects of a heat gun.
The assumption of a high risk of contamination of the ceiling with glue, paint, solvent does not stand up to criticism. Here, as in the case of wallpaper, the ceiling can be closed, but not with a film, but with masking tape around the perimeter. After finishing work, adhesive tape is easily removed without leaving any traces (it is strictly forbidden to stick stationery tape - after it there are traces of glue noticeable in any light).
To avoid cuts in the ceiling, not only in theory, but also in practice, if the wallpaper is glued to size. In this case, their top starts up close to the bottom of the baguette - nothing needs to be cut. If you want to display a pattern, then you need to do this on the floor in advance, and then cut the sheet to size.

A number of builders suggest using fabric instead of PVC to avoid the effects of the heat gun on wallpaper glue if the wallpaper is already pasted. But replacing the material greatly affects the family budget. The solution to the problem, as in the case of vinyl wallpaper, in a plastic film, which closes the walls. Her purchase is many times cheaper than switching to a fabric ceiling.
The problem of trimming wallpaper with a finished ceiling is slightly contrived. Working simultaneously with a wide spatula and a knife with a removable blade, the wallpaper is trimmed without problems. The main thing is not to rush.
Thus, the thesis that the problem of priority was invented by the teams of builders artificially is once again confirmed.

Optimal finishing technology
Involving a single performer in the repair of an apartment (house) makes it possible to apply a phased method of decorating walls and ceilings. This, as noted above, eliminates the problem: what's ahead, wallpaper or stretch ceilings.
For information: two different teams will refuse phased technology or will require compensation for downtime during the operation of allied workers.
The phased work scheme consists of the following operations:
- preparing the walls for gluing trellises,
- fixing the baguette
- taping the walls with tapestries,
- stretch ceiling devices.
This work procedure allows you to eliminate possible problems:
- there is no distortion of the baguette strip, and therefore, gaps and cracks do not form due to irregularities in the wall surface - it is aligned,
- wallpaper is not contaminated - dust generated during mounting of the frame (baguette) for the stretch fabric is removed,
- there are no risks of cutting the ceiling cloth - there is no need to cut the wallpaper now, or during subsequent repairs after a few years,
- the stretched ceiling cannot get dirty - the tapestries are already pasted.
Conclusion
If you plan to arrange a stretched ceiling, you need to think about the choice of people who will carry out repair work, and not about that first, wallpaper or stretch ceiling. Specialists will independently figure out what to do first and second.
Indeed, from the technological side, the sequence of work does not play a big role if repairs are performed by highly qualified specialists. They are obliged to the extent of their skills and experience to wallpaper and stretch the ceiling without marriage. If there are punctures in the work, then all the mistakes made are corrected at the expense of the contractor.
You can only glue the walls yourself before installing the stretch ceiling. The latter is best left to installers.
We solve wallpapering and stretch ceilings
Work can be carried out in any order if they are performed by highly qualified specialists. But if repairs are done by people who do not have enough skills, then unpleasant nuances may arise. Before proceeding to the main stage, preparatory work should be performed. They include:
- Cleaning walls and ceilings from old finishing materials.
- Coating surfaces with antifungal agents.
- Minor defects and cracks are eliminated.
- Walls and ceilings are plastered and plastered.
After that, all the necessary measurements and calculations are carried out, materials are purchased in the right amount. The final step is to fix the baguette at the base of the structure.
What will be the first: pasting walls or installing a stretch fabric is influenced by the design of the top that you have chosen. There are several types of ceilings that are popular now. It:
- The stretch fabric will not be placed around the entire perimeter of the room, but a box will be inserted. This design involves the preliminary installation of drywall oval, round, square or any other shape. The surface is putty, painted, and only after that the stretch web is installed. From the foregoing, it follows that the room should be as ready as possible, all finishing work must be completed, before installing the ceiling.
- The stretch fabric is decorated with baguettes. With this option, a strict work procedure is recommended. First, puttying of the walls is carried out, then the tension coating is installed. Last but not least, a baguette is attached. It is putty at the joints and painted. Only after all the procedures described are the walls finished.
- The stretch fabric covers the entire perimeter of the top. Here you can choose any sequence. It all depends on how it will be easier for you, and how much you can cope with the nuances that arise in the process.
Draft work is over and the fun begins. Consider both options and the possible consequences of their application.

First wallpapering.
This option is chosen by many, believing that the glue, paint or solvent used in the gluing process will severely contaminate the ceiling. Some compounds are capable of causing irreparable damage to the canvas, spoiling its appearance or texture. This is especially true for paints if you glue wallpaper, which you will then process with them.
The disadvantages of the selected method and their solutions:
- When installing the baguette, many holes are drilled. This often leads to wallpaper pollution. To prevent this, you can use a hammer drill with a vacuum cleaner. He will not protect from all dust, but will reduce its amount to a minimum.
- Installation of a stretch ceiling occurs at high temperature. The room heats up to 60 degrees above zero. Such conditions may cause the wallpaper to peel off. But such a situation arises from a violation of technology. Install the canvas only after the wallpaper is completely dry. This takes about 6 days at room temperature, so do not rush. Having finished sticking, invite the measurers to order a stretch ceiling. As a rule, it is made within a week. This time is just enough to dry the wallpaper.
- Careless use of tools such as a spatula, scissors can damage the ceiling. Here, when cutting canvases, jewelry accuracy is required.
- Replacing the wallpaper after the repair is completed will be much more difficult.

First the ceiling, then the wallpaper.
The stretch ceiling can be installed in two ways:
- Harpoon way. First, the parameters of the room are measured, for the manufacture of the canvas. After that, experts install a baguette on nails driven into the wall in advance. This method will remove up to 4 centimeters in height. Using a special gun, the canvas heats up, stretches and snaps into place. After some time has come, it hardens and looks perfectly even.
- The second method is as a harpoonless. The canvas is clamped, like a fabric on the hoop. This is a cheaper method that does not require preliminary measurements. But, in case of poor installation, the ceiling may sag.
In addition to film, there are fabric ceilings. Their feature is that they do not warm up during installation. There are no seams on them that make such a stretch fabric sufficiently strong. Installation of a fabric ceiling begins not from the corners, but from the middle. It turns out something like that on the cross. Already guided by it, the material is pulled from the central part to the corners. Installation is made with a special spatula. The edges that hang down are trimmed with a knife.

Important! If wrinkles occur during installation of the fabric, do not panic. They are easy to fix with a building hair dryer.
When the method of installing the stretch ceiling is selected, we consider the arguments of experts in favor of the fact that the wallpaper needs to be glued after. The main one is that you can cover the canvas with a film so as not to stain. In the opposite case, the ceiling cannot be protected. Also, the heat treatment of PVC - coating will not affect the wallpaper.
In addition to contamination of the ceiling with coloring and adhesive materials, the minuses include wallpaper clipping. After gluing a technological tape, it will be quite difficult to align the fabric.
Ceiling installation in stages, as an option for a costly compromise
This method is rarely used by professional builders and people who make repairs on their own. The thing is that it requires more money and time to work. But if you are interested in a qualitative result, then you should pay attention to it.
The installation diagram takes place in several stages:
- walls are aligned
- a baguette is installed,
- wallpaper paste
- ceiling ceiling is installed.
How to paste wallpaper with a stretch ceiling

The service life of stretch ceilings, as a rule, is not less than 10 years. But at the same time, you will want to change the wallpaper much earlier, after 4-5, for sure. What to do in this case, because changing everything will be quite expensive? You can stick wallpaper without damaging the ceiling.Such work is carried out in several stages:
- First, remove the interfering furniture and glue the masking tape on the edge of the ceiling. Of course, this will not help from damage by cutting objects, but it will save you from touching it with a brush.
- We clean the walls of old wallpaper. To do this, cut them as close to the base of the profile as possible. Pick as sharp a tool as possible to make a straight line.
- Wallpaper is wetted with warm water to make it easier to take off. If there are minor defects and bumps on the walls, then they need to be eliminated. But leveling with plasterboard and putty is not recommended when there is already a stretch ceiling.
- Prepare the walls for gluing by treating them with a primer. Near the ceiling, this should be done as carefully as possible, because it will be difficult to remove pollution.
- Before wallpapering, you should decide whether there will be a baguette in the room. Experts advise using it. This decorative element serves not only as a decoration for repairs, but also covers uneven sections of wallpaper and the joint of the ceiling with them.
- Cutting paintings and fitting the picture should be done on the floor. After all, leaving this matter for later, you risk damaging the stretch ceiling with sharp objects.
Sticking wallpaper when there is a stretch ceiling is quite painstaking work. By following the simple recommendations of specialists, you can do the job efficiently.

How to combine stretch linens and wall decor
If the decision what to do first of all: to install a stretch ceiling or to glue wallpaper is already there, and the materials have not yet been bought, you should think about how to choose them correctly.
- If you have an ordinary apartment or house, with a standard wall height, you need to choose the right color scheme. She should not make the room smaller visually.
- Windows that face north, do not allow maximum illumination of the room. Even in the afternoon she looks dull and gloomy. Bright colors, such as orange, will make the room lighter and more sunny.
- The opposite situation is when the windows face south. A too bright environment will interfere. All the time there will be a desire to lower the blinds. In this case, you should choose calm colors, such as sea waves, turquoise and pastel shades.
- To make the room taller, you can pick up a stretch coating of a light shade. In this case, the bottom should be dark. This combination will work in contrast.
- If there are no windows in the room, you should choose light shades for the top. When your taste tells you only dark colors, then buy a stretch fabric with a glossy effect. The walls will be reflected in it like a mirror. This will visually stretch the room.

Wall Finishing Options
- If the owners plan to rarely change the wallpaper, before joining the necessary baguette, first of all, do wallpapering. When the wall decoration is completed, pull the canvas. Masters very high quality make pasting and install ceilings, as a result of which there is no deformation of rolled paintings.
- If you plan to change the wallpaper often, you should take care of installing the stretch ceiling in advance, and glue the wallpaper material at the bottom of the edge of the tension surface.
This will allow you to easily remove the material during a new repair and not spoil the tension structures.
Stretch ceiling after wallpapering. is it possible?
The use of a hammer drill with a vacuum cleaner will help reduce dust formation.
The disadvantage of this method is the difficulty of removing pressed wallpaper baguette when gluing them. This is actually not the case. They are easy to cut with a knife on a baguette and glue new butt to it
Observance of simple rules and caution when installing the ceiling will keep the new decor on the walls
Having studied the pros and cons, it can be said that installing the ceiling can do little harm to the wallpaper-glued walls. Basically, the installation of the ceiling is the final repair work.
And if the question arises, what is the first to glue the wallpaper or stretch ceiling, it is better to focus on the first gluing of the walls.
Useful video tips from experts:
The sequence of actions is very important during the repair. This affects the quality of work performed, and sometimes even the total cost of materials used. It is first necessary to draw up a work plan. In particular, this applies to wall and ceiling decoration.
It is very important to decide what to do first: wallpaper or stretch ceiling
First the ceiling, then the wallpaper
Finishers say that if you still first install the suspended ceiling, and only then glue the wallpaper, you must remember that the rough preparation of the walls in the room must in any case be done before the profile begins to be mounted. If you do not prepare the wall before installing the ceiling baguette, it will never be installed exactly, and it will be impossible to hide defects in the future.
You also need to remember that if you first pasted the wallpaper, they can be protected with a special film, or even ordinary newspapers. But if you first installed a stretch ceiling, it is unlikely to cover it, and drips of wallpaper glue can cause permanent damage to the cloth - you just can not then clean the surface of the ceiling, and sloppy traces of glue will appear on a perfectly even cloth. If the glossy film ceiling can still be wiped, then expensive fabric cleaning is almost impossible.
Preparing to install a stretch ceiling
Whatever the room, before performing installation work, it must be put in order. The only question is how, what and in what sequence to do.
Here the room preparation algorithm is as follows:
1. If the room has products made of thin plastic, then they should be protected from overheating and deformation (for example, corners on windows). It is enough to fix on the surface a piece of masking tape, and after completion of work to remove it. As for the window structures themselves, they do not need to be protected separately.
2. Furniture, as well as large objects that will interfere with installation work, should be moved outside the room or at least moved away from the surface of the walls. It is more difficult with dimensional furniture - it will have to be pulled to the central part of the room, and covered with a sheet from above. At the same time, make sure that the tightened “heap” does not interfere with the installation of the main light source in the center of the room.
3. Despite the relative cleanliness of the work, it is desirable to cover the floors with cellophane or cloth. To prevent material from slipping, it can be secured with tape along the edges. This saves time for subsequent cleaning. In this case, there will be less dust in the room. If there is parquet or laminate on the floor, then such forethought is all the more relevant. Otherwise, even dust can cause micro-scratches.
4. Decor elements that are mounted on the walls, it is advisable to remove and take to another room. Please note that access to the walls must be free.
5. Remove equipment from the room that could be damaged if exposed to high temperatures. Here we are talking about video recorders, a home theater, a TV, a music center and other equipment.
6. Note that domestic plants may not survive installation work, so they should be removed first.
7. Before starting the installation, it is worth determining the location of the wiring, so that during the mounting of the cornices, you do not accidentally damage it. The same requirement applies to ventilation and other communication systems. The task of informing lies with the owner, because representatives of the installation team may not know such subtleties.
8. The number and location of light sources should be planned in advance and agreed upon by the parties - installers and the customer.
9. The base ceiling must be treated to prevent plaster or pieces of wallpaper from falling. If the ceiling is tiled, then before installation, it must be removed.
10. Before installation, it is advisable to complete the finishing work in the room. Otherwise, all the elements will have to be “docked” to the already installed ceiling (for many this causes difficulties).
11. If the work is done independently, then it’s worthwhile to study the videos or photos of the preparation of the ceiling for suspended ceilings, after which it will be easier to perform the work.
Installation of fixtures
In general, the installation of mortise lamps in combination with a stretch ceiling looks like this:
- Under a pre-mounted platform, a reinforcing ring is glued onto the canvas.
- The canvas is cut along the inner edge of the ring.
- Wires are pulled out into the slot and connected to the lamp block.
- The luminaire is inserted into the fixtures of the platform and is aligned in height.
- Chandeliers with a long suspension are attached to a standard hook in the draft ceiling or, again, to a previously prepared site.
- Explosions during installation - duty horror story. Gas cylinders explode. Ways to avoid an incident are reduced to compliance with safety regulations.
Stretch ceilings are divided into two types:
- PVC film. It has a wide range of color shades, thickness from 0.15 to 0.35 mm, safety for health, and therefore, such a ceiling can be mounted without fear for children.
- A fabric web is created by weaving from individual fibers, has less tightness than a PVC film and has a not-so-rich palette of colors.
But the fabric can be dyed in any shade, apply a picture. Also, such materials breathe well and are environmentally friendly.
Installation of paintings on the frame is one of two options:
- Hot way. Designed for PVC film and involves the use of a heat gun, heating the coating to the required temperature. The film stretches as it cools.
- In a cold way, fabric coatings are mounted. They are attached to baguettes and pulled, after which the seams are decorated with ceiling skirting boards.
If you first glue the wallpaper, what is important to consider
The first thing you need to pay attention to is a type of wallpaper. Cheap paper webs may not survive the heat stroke from a ceiling gun
In addition, it will be almost impossible to wash off the dirt, which will certainly remain after installation. Cloths are also afraid of dirt, it is better to cover them with foil for any kind of work.
One of the processes of mounting the ceiling is drilling holes in the walls to secure the profile. Wallpaper pollution cannot be avoided anyway. If you have washable wallpapers, then there should be no problem. Just as the work progresses, try to immediately clean already drilled areas.
If you often re-glue the wallpaper, then the ideal option would be to paste the wallpaper under a decorative baseboard. Then it will be possible to simply trim them at the junction, and stick new ones.
How to glue wallpaper with a stretch ceiling: process features
If you have already decided that at first - a stretch ceiling or wallpaper - it’s easier to work. By the way, there is another option, but workers rarely undertake it, since it is more labor-intensive, albeit reliable.
There are two common ways to install a stretch ceiling - bead and harpoon
So, if you decide that you are pulling the ceiling after the wallpaper:
- You may encounter such a problem - when a baguette is installed, a lot of holes are made in the wall, and this is not only excess dust, but also pollution of new wallpapers,
- Another problem - when installing a PVC cloth, heating is required, and heating in a room seriously increases the risk of wallpaper being peeled off,
- The installation of the ceiling itself can damage the wallpaper, if good craftsmen do it, you will not encounter such a problem, but in principle it is possible.
Advantages of the harpoon method: easy dismantling and, subsequently, replacement of the stretch ceiling
But no one is stopping you from taking reasonable steps. For example, a measurer comes to take measurements from a room where the walls are even. This is correct, because the accuracy of such measurements will be higher. To make the canvas itself, it takes about a week, and during this time the wallpaper will dry out well and become more resistant to temperature effects.
Specificity of suspended ceiling systems
Tension cloths belong to the type of finishing materials that can be installed not only in the process of major repair activities, but also in an autonomous manner. By itself, the installation of the structure is implemented quickly enough, without requiring special preparatory procedures. This makes it possible at any time to refresh the interior, making it more interesting. Investigating the question of when to make stretch ceilings during repair, it is preliminary recommended to study the features of the system itself. We are talking primarily about the specifics of the construction of the mounting frame and the physical characteristics of the decorative coating.
The stretch fabric, which is installed on top of the finished frame, can be film and fabric. In turn, films are divided into matte, satin and glossy varieties (according to the type of texture). We are talking about a fully synthetic, elastic material that is easily stretched using special devices. The main component of this coating is vinyl. Using film webs, you can create ceiling systems of various configurations
The main weak point of the films is their low mechanical strength: any careless touch with a sharp object can seriously damage their surface. This places additional responsibility on installers.
In the manufacture of fabric webs, knitted weaving with polyester fibers, additionally impregnated with polyurethane, is used. As a result, the material receives additional strength. Specialized stores offer a huge assortment of fabric coatings in color, texture, and decoration. The disadvantages of textile material include its high cost and low moisture resistance.
General advantages of suspended ceilings:
- Easy to install. At the same time, you do not need to worry about which ceilings you can make stretch ceilings on: almost any foundation is suitable for this.
- During the installation of the structure, construction debris practically does not occur, as with other types of finishing work.
- High service life.
- Excellent aesthetic characteristics.
- The possibility of using paintings in combination with other types of ceiling finishes.
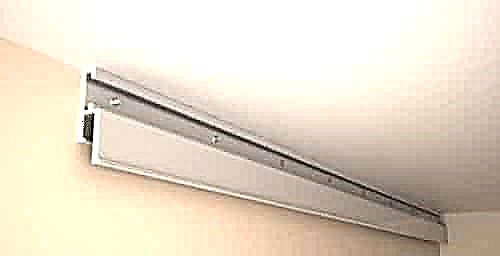
Installation of stretch linens can be carried out by harpoon and harpoonless method. In the first case, it is required to measure the surface of the ceiling, which will allow manufacturers to accurately cut the canvas. The frame is lowered 40 mm below the base floor: such a small indentation practically does not affect the overall height of the room. At the same time, all the flaws of the rough base are well masked under the decorative coating. Over the installed frame structure, the canvas is stretched. To increase its elasticity, the room is heated with a heat gun before pulling (this applies only to PVC films).
After pulling the fabric is fixed using the harpoons available at its edges. As it cools, the film straightens, becoming perfectly flat. In the non-harpoon way, textile ceilings are most often mounted, because the film may then sag. During installation of the fabric coating, heating the room is not required. In the future, such a surface is allowed to be painted or equipped with artistic painting.
Installation of PVC canvas after wallpapering
If you decide to mount the ceiling after gluing the wallpaper, then experts advise you to wait until they are completely dry. This can take up to 5 days, but you will be sure that they will not begin to peel off.
If you often do cosmetic repairs, then stretch ceilings are installed before wallpapering.Masters will mount the frame and stretch the canvas, along the edge of the baguette it is necessary to carefully glue the wallpaper. If you decide to change the finishing material, then you can easily remove the old material. In this case, there will be no damage to the stretch ceiling.
The reasons why the suspended ceiling is not recommended to be installed after wallpapering:
- When installing the frame for tensioning the canvas, you will need to drill holes in the walls. All dust will settle on new wallpaper. If you use the services of professionals, then they are used for these purposes punchers with a vacuum cleaner to prevent dust particles from entering the surface of the walls,
- Under the wallpaper may be a wall that does not meet the strength requirements. When mounting the frame, it may begin to crumble or crack,
- When installing the ceiling after wallpapering, the likelihood of spots on the coating is not excluded. This is due to the humidity of the work, because when it is carried out in the room, the temperature will increase.
Having made the decision, install the stretch ceiling before the wallpaper, then first prepare the walls. Only after they have been plastered and the finishing material remains to be glued, can the ceiling be installed.
It is important to exercise extreme accuracy. Decorative cornices, borders, patch panels - all this will mask the uneven joint between the wallpaper and the stretch ceiling
Therefore, if you are not sure that you can make a perfectly smooth transition, then these products will allow you to hide defects and shortcomings that have arisen during the work.
Repair Tips
If after installing the stretch ceiling the next few years you do not plan to carry out repairs, it is best to make the walls first. It is also advisable to start stretching the ceiling after completing all the finishing work, including painting. If the ceiling is already installed, and you need to align the walls for wallpapering, do not plaster them to the very top. Be sure to cover the ceiling with foil and masking tape. Aligning the walls with drywall in this case is unacceptable, since it is no longer possible to install the necessary fastening on the ceiling.
If the wallpaper is first glued, it should be remembered that it is possible to mount the frame under the suspended ceiling only after they have completely dried.
If you are afraid to stain new wallpapers while drilling a brick wall, use both a drill and a vacuum cleaner. So you prevent the spread of dust throughout the room.
Mount the frame under the stretch ceiling only after the wallpaper has dried. Wait about 3-4 days for the glue to dry completely and the wallpaper will sit on the wall. This will prevent them from peeling off and diverging in the area of joints. To protect the finish of the walls, you can cover them with foil.
At the end of all repairs, thoroughly clean. You can clean the stretch ceiling with a vacuum cleaner and a damp cloth. If dirt has soaked into the cloth, use a soft brush and a few drops of universal detergent. To give the surface a characteristic shine, wipe it with a solution of ammonia in a ratio of 1: 9.
There are several options for resolving the issue of what comes first: wallpaper or ceiling. It is advisable to mount the stretch ceiling after carrying out all the finishing work on the walls. You can do it immediately after leveling the walls, and then paste the wallpaper
But regardless of your choice, it is equally important to do everything carefully. Observe safety precautions, which will also reduce the risk of damage to finished surfaces.
They wanted a hi-tech, but got a hi-tac. A sad joke about an unsuccessful repair, which hides the disappointment of many owners who have not managed to bring all their ideas and actions to a common denominator. And all because the guarantee of a successful repair is the correct sequence of its implementation. And if stretch ceilings appear in your work plan, then it makes sense to think about how to solve the problem correctly: do you make the stretch ceiling first or do you glue the wallpaper? In order to avoid the appearance of fatal errors, we will try to deal with this dilemma.
Professional repair specialists avoid giving unambiguous answers on this matter. And they’re doing it right, because before you begin to perform a specific type of work, you should thoroughly study the premises placed at their disposal
Pay attention to the wishes of the owners, clarify some details that only at first glance seem completely insignificant and not worthy of attention. In addition, there are pros and cons in each case.
Why is repair work important?
The problem of the order of execution of the work may seem important if you visit the forum of finishers or lovers to make repairs yourself. It is caused by the fact that these works are often performed by different specialists: wallpaper is glued on the walls by finishers, and installers install the canvas of the tension flow. At the same time, the team that will work the second will face inconvenience. Here are some of these difficulties:
- The need to maintain the integrity of already established coverage. With any careless movement, it is easy to damage stretch ceilings. Wallpaper, in turn, can be damaged by the hot stream of air created by the heat gun during the installation of ceilings.
- The need to maintain cleanliness. Just a few sprays of glue are enough to spoil the new coating so much that you have to redo the work.
Therefore, finishers often agitate the first thing to glue wallpaper, and installers argue that, on the contrary, you must first stretch the ceilings. Consider the arguments of each side in this dispute and evaluate the arguments in favor of each decision.

The classic solution: first glue, then pull
Often, inexperienced craftsmen prefer to move from bottom to top - from walls to ceiling. This solution has a significant advantage: since stretch ceilings are installed without the use of glue or water, it is not likely that dirty sprays will leave stains on the walls. In addition, there is no risk that it will be possible to break through the canvas with careless movement, aligning the wallpaper sheet at the junction between the wall and the ceiling.
Prefer the classic order (first stick the wallpaper, then engage in the decoration of the ceilings) when using wallpaper for painting. During the painting process, it is easy to stain the ceiling.
Another argument in favor of this solution is from the field of economics: if the film or fabric used in the decoration of the ceiling is damaged when gluing the wallpaper, it will have to be completely changed. Such a replacement will be expensive, and the size of the losses will be 1.5–2 times larger than when replacing a soiled or damaged sheet of wallpaper. Therefore, more expensive finishing material should be set after a cheaper finish is installed.
The third argument concerns the possibility of reducing the time spent on repairs. Once the walls are finished, you can make the ceiling. Another optimization opportunity lies in the fact that less thorough adjustment of the wallpaper sheets in height is allowed. The uneven upper edge of the coating will hide the baguette used when stretching the ceilings.

The procedure for the performance of the classic repair technology
The procedure in the classic embodiment looks like this:
- Rough finishing of walls and ceilings is carried out: unevenness is eliminated, a primer is applied.
- Sheets of wallpaper are glued onto primed walls.
- On the walls, horizontal lines beat off. The laser level quickly helps to do this, but you can do it with the help of a plumb line, building level and tape measure.
- Holes are drilled along the line, a baguette is installed.
- The stretch ceiling canvas is attached at the corners, and then warmed up with a heat gun.
- The straightened canvas is refilled in a baguette.
After installing the ceiling, a baguette firmly presses the top edge of the wallpaper. This will ensure a perfectly even boundary between the wall and the ceiling, but in the future it will be more difficult to remove the wallpaper when replacing it.
Why is this option imperfect?
Despite all the advantages of classical technology, there are significant arguments against it:
- To fix the baguette, you need to drill the walls. Dust from concrete or brick will be very noticeable on light wallpaper. Cleaning the walls after installing the baguette will not be easy.
- To heat the web, a heat gun is used, which creates a stream of hot air. Its temperature reaches + 80 ° C. From such heat, recently pasted wallpapers often peel off from the walls. This danger is especially high for heavy, dense varieties.
- Vinyl wallpaper is often deformed by hot air.
- When the canvas is tucked into a baguette, it is easy to damage the wallpaper with the careless movement of the tool.
The main drawback of classical technology lies in the different service life of coatings for walls and ceilings. If the stretch fabric or film lasts 15–20 years, during this time you will have to re-glue the wallpaper at least 3 times. Therefore, you still have to master the technology of neat wall decoration.

We do the opposite: the pros and cons of the option
An alternative technology assumes that the repair is done in the reverse order: first, the stretch ceiling is mounted, and then the wallpaper is glued.
The procedure is as follows:
- Wall and ceiling roughing is in progress. It is made in the same way as for repair according to the classical scheme.
- Guides are attached to the walls, they are set according to the level.
- They pull the canvas, fix it in a baguette, put in place the decorative moldings and caps.
- Sheets of wallpaper are glued onto the walls, carefully fitting the upper edge so that there is no gap between it and the baguette.
This is a slightly more time-consuming method, as the wallpaper will have to be tried on several times to achieve a perfectly flat edge. But when drilling the walls on the wallpaper there will be no traces of concrete or brick chips.

How to choose the best repair technology?
Since both sides of the dispute give arguments of approximately equal strength, it turns out that the choice of a particular technology depends on what materials are planned to be used in the repair.
Here is what professional finishers and installers advise:
- If you plan to glue vinyl-based wallpaper, heavy varieties or sheets with a light color on the walls, it is better to finish the walls after installing the stretch ceiling.
- If you decide to install ceilings after pasting the walls, the wallpaper is protected from pollution by a layer of plastic film. It is glued with masking tape along the installation line of the guides. Then the baguette is mounted and the film is removed.
Dust-free drilling techniques help reduce the chance of wall contamination. These are a variety of dust collectors, from homemade paper envelopes to special nozzles on a perforator.
There is a technology in which both types of finishes are performed in parallel. This is how large companies operate, which have specialists in both types of finishes. Such work requires a bit of time. In addition, teams that are able to perform work under this scheme usually set the highest prices for their services. But on the other hand, repairs carried out in such a parallel manner look especially neat.
If it is planned to hire workers for repairs, it is worth taking care, first of all, not of the order of the work, but of the search for sufficiently qualified specialists. And with an independent repair, the algorithm is selected based on the characteristics of the selected finish.
Wallpaper or stretch ceiling what first: expert opinion
Each specialist prefers to make repairs according to his scheme, taking into account the general technological aspects. But without knowing the features of your home and previous repairs, he won’t say right away where he will start.
So what is done first:
- First option. It depends on the frequency of wallpapering. For example, if before that the wallpaper had not been re-glued for ten years or more, then before fixing the baguette for PVC you can glue the wallpaper, and after that the canvas will stretch over them. If the repair is done by the masters, then they do not deform the wallpaper in any way, if you have experience in gluing and installing the ceiling, everything should also be done carefully.
- Second option. It applies to those who are used to often wallpapering. Then the wallpaper needs to be glued from the bottom of the edge along the edge of the stretch ceiling. That is, when you are going to stick new wallpapers on the wall, you can easily remove the old ones. Tension structures when removing old wallpaper will not be affected.
How to do it, decide based on the opinion that the more often you prefer to glue wallpapers, the more appropriate it is to glue them after fixing the ceiling.
If you monitor the reviews on special forums, we can say that people also look at the circumstances surrounding the repair. For example, at first people stick on ceiling skirting boards, often do it with painting. After the gap that remains between the skirting boards and the walls, they are sealed with putty. And only then wallpaper is glued.
It turns out that with subsequent repair, the old wallpaper is removed, after which the new ones are glued. And the ceiling skirting boards do not need to be installed, but you can simply repaint them if they contrast with the new wallpaper.
Is it possible to stretch the ceiling after wallpapering: so still after or before
Of course you can, given all the above points. And, for example, if you glue wallpaper for painting, you have no other option. It can be done differently, but there is a high risk of damaging the ceiling with the same paint.

By the way, if holes are made under the ceiling, or rather, a baguette, you can use the same hammer drill with a vacuum cleaner. This is not a solution to all problems, but this method minimizes some of the consequences.
Many are afraid of this method, thinking so - looking ahead, you can imagine what difficulties will arise when wallpapering. But cutting the wallpaper is actually not at all difficult. And still no one bothers you to beat off the installation level of the baguette around the perimeter of the room. Then you can stick the wallpaper from him. And even if some differences are found, they can be hidden with a decor tape or an insert.
How to re-stick wallpaper with a stretch ceiling: are there any nuances
Whether you are gluing new wallpapers, or you decide to paint the walls, you need to act according to one scenario.

Wall decoration plan under a stretch ceiling:
- First remove the decorative insert, which protects the joint of the walls and the stretch ceiling,
- Then, with masking tape around the perimeter, glue the fields of the ceiling, so that during painting or pasting the ceiling will not be damaged,
- To the bottom edge of the web, install a spatula and plastic of the desired width, and cut off the excess wallpaper part along the bottom edge,
- Place the insert in place already cut to size when the stretch ceiling is installed.
Since there is virtually no restriction on the service of suspended ceilings, you will probably have to re-glue the wallpaper at least once.
Before you glue the wallpaper, remember the following stages of preparing the walls: remove the old finish, treat the walls with antifungal primer, seal all cracks and holes, putty and plaster the walls.
And the process of cutting the wallpaper is not as scary as it seems, that is exactly what almost everyone who glues wallpaper under a stretch ceiling does it.
Therefore, the method when the stretch ceiling is installed only after pasting the walls is considered more preferable.
How to protect the walls
Mounting the frame for a stretch ceiling is a rather dusty process that can lead to contamination of the wall covering. To avoid this, the walls can be covered with a protective film, and cement dust during drilling can be collected using a vacuum cleaner.
The high temperatures that are required to install PVC ceilings can cause the wallpaper to lag behind the walls.Therefore, the installation of ceiling structures should begin after the complete drying of wallpaper glue. This occurs approximately on the fourth day after gluing, subject to normal temperature conditions.
If the installation of ceilings is done by yourself, the negative effects on the wall coating can be minimized, alternating the process of installing the ceiling and wall decoration. It looks like this:
- Preparing the walls for wallpapering or painting.
- Mounting frame for stretch ceiling.
- Directly pasting or painting the surface of the walls.
- Installation of a ceiling cloth.
This sequence of work contributes to a snug fit to the wall of the baguette, eliminating the contact of wallpaper or painted walls with cement dust, and the ceiling with paint and glue.
Preparatory work
The long service life of suspended ceilings depends on a combination of factors. With proper installation, the ceiling structure should not sag over time, deform, and condensation should not remain. Accordingly, before installation it is necessary to carry out a number of preparatory work.
At the preparatory stage, the following actions must be performed:
- prepare the room
- surface preparation
- carry out electrical work,
- prepare the walls
- mark up.
Room preparation
Before installing suspended ceilings, it is important to prepare the room: cover or clean the furniture, remove the hinged shelves and cabinets, move flower pots and other objects to another place that may interfere with installation work. If necessary, dismantle expensive flooring
Parquet can simply be covered with cardboard
If necessary, dismantle an expensive floor covering. Parquet can simply be covered with cardboard.
Ceiling treatment
Before installing the tensile structure, the ceiling must be prepared for the coating, which includes such steps as:
- it is necessary to clean the surface of the ceiling of plaster, putty and dirt,
- in a new house, it is recommended to glue all the joints between concrete panels, for example, using PVA and a bandage,
- large cracks are treated with construction foam, and small ones are treated with sealant,
- if a fungus or mold is found on the base ceiling, it should be cleaned,
- two coats are applied to the ceiling surface.
Electric installation work
Spotlights are usually placed on stretch ceilings, which are purchased in advance. The power of lighting devices for these purposes does not exceed 60 watts. You can use halogen lamps up to 35 watts. LED and energy-saving lamps can be any, they do not heat up like incandescent lamps. The locations of such fixtures are marked in advance for wiring electricity.
Walls
Before installing the stretch ceiling, it is also necessary to prepare the walls: remove the old coating from them, wallpaper, paint, even with putty if necessary. If it is not planned to level the walls, then you should check for unevenness of the profile attachment point. Wallpapering is possible again only after finishing work on the ceiling surface.
Markup
Before installing the web of the tensile structure on the surface of the ceiling, marking is mandatory. The nature of the marking will depend on the type and shape of the coating (single or multi-level ceiling), on the height of the tensile structure and the lighting features. To correctly measure the ceiling, it is necessary to put the necessary marks in the corners of the room, for example, with a laser level. The resulting points are connected in such a way that a solid line runs along the entire perimeter (a building cord will help). Between the line and the overlap, a distance is formed that needs to be measured. You need to measure the distance from the lower point to see the upper level of tension.
Measure the height of the "step" in order to get a mark on finding the lower level of coverage. The distance from the received points to the main line is measured, which is transferred to the remaining angles. When connecting the dots, several straight lines parallel to the main line are obtained (a hole is marked on the line). All remaining tiers are marked in the same way. From the drawing, the labels of the location of the lamps, as well as the location of the levels, if it is a multi-level design, are transferred to the coating.
Chandelier Installation
To install the chandelier on a plastic suspended ceiling, you must perform a series of manipulations. It should be noted that the film under the weight of the lighting device can be deformed and torn. To avoid this, when installing a PVC sheet, you will need to perform several simple steps.
You need to purchase special protective rings made of plastic. They will prevent the destruction of material at the installation site of the chandelier. How to install fixtures in a suspended ceiling? There is a certain technique.
The circlip must be glued to the film in the place where the mounting platform or hook is installed under the blade. You need to wait. When the glue dries, a round hole is cut out in the center of the ring with the help of a clerical knife. An electric wire is pulled through it.
The chandelier is connected to the mains. Then it is attached to the prepared platform or hung on a hook. A decorative cap covers the installation site. If desired, you can create a system of spotlights. In this case, protective rings are also used.
Preparation for decoration
Regardless of what will be installed first - a suspended ceiling or wallpaper, it is necessary first of all to carry out a number of preparatory work. One of the most important steps is to remove the old coating from the surface of the walls and ceiling. In addition to the coating itself (paint, lime, etc.), you must also remove all existing contaminants.
If the surface of the walls or ceiling is initially not smooth enough, then before carrying out any finishing work, it is necessary to putty all the defective areas. All areas where there are various biological damage must be treated with protective compounds. You also need to pre-lay all the wiring (in the channels or corrugation) and select places for lighting fixtures. Only when the preparation is completed does it come time to be interested in when it is possible to stretch the ceiling after wallpapering.
What affects the order of work
Professionals offer to consider two options for the final decoration of the premises:
- Wallpaper the walls after installing the stretch ceiling.
- Install the ceiling after wallpapering the walls.
Do they glue the wallpaper first or do they stretch the ceiling? What sequence of actions to choose? Both options can be called correct. And they will give excellent results, if the finishing specialists with experience will be engaged in these works. However, each stage of finishing an apartment or other premises will in any case create some difficulties. It depends on certain circumstances that should be considered.
Firstly, it is necessary to decide whether the ceiling skirting will be installed
Secondly, you need to pay attention to the material from which the walls are made. And finally, thirdly, you need to know the quality of the canvas from which the stretch ceiling will be mounted, as well as the features of its fastening
Factors affecting the order of work
In this situation, experts will offer 2 exit options:
- Pasting the walls after installing the stretch fabric,
- Installing the stretch fabric after gluing the wallpaper and finishing all finishing work in the apartment.
Both options will be true, and if the work is done correctly by good specialists, they will give a positive result. But in reality, each work can present its own difficulties. It all depends on the repair conditions and some factors:
- Is there a ceiling plinth
- What material are the walls made of?
- Applicable tension web with fastening system,
- The quality of the lining, which will affect the frequency of its change,
- The invoice and color selected under a stretch canvas.
Phased installation of ceilings
If you have not decided yet that first - the wallpaper or the suspended ceiling are mounted - we suggest you pay attention to one more way. It is used quite rarely, since its implementation significantly increases costs, which is usually disadvantageous to customers and contractors
But at the same time, this method guarantees excellent quality and minimization of all possible disadvantages of the previously described methods. It will be a phased installation of ceilings.
A similar installation scheme is performed in the following sequence:
- Alignment of the walls.
- Installing a baguette.
- Wallpapering the walls.
- Installation of a ceiling cloth.
In this case, a number of disadvantages that accompany the described traditional technologies can be avoided:
- The baguette lays on the prepared wall without gaps and crevices, absolutely evenly.
- When attaching a baguette, the resulting dust does not harm the wallpaper.
- Wallpaper is glued and even painted without the threat of damage and contamination of the ceiling. In addition, the wallpaper is much easier to fit under a baguette, and small gaps easily overlap decor.
- When the wall surface dries completely, it is covered with a protective film that prevents damage and reduces the effects of high temperature. Therefore, with a professional approach, the installation of the ceiling can be done without much concern.
- Given the fact that when installing fabric ceilings, heating the room is not required, this method can be considered the best option, which equally preserves the surface of both the ceiling and walls. Therefore, when deciding on the choice of what to install wallpaper or a stretch ceiling first, it is advisable to slightly increase the budget for repairs, but to achieve excellent quality by reducing various risks.
Option: first we deal with the walls
Plus the only, but significant: no matter how you go out while wallpapering, there is no possibility of damaging the stretch ceiling. For lack of such, they will install after work with the walls. Alas, there are significant disadvantages:
installing baguettes under the ceiling fabric, you need to drill a lot of holes. Part of the dust will surely settle on the wallpaper,
Installation of baguettes after wallpapering
- improper operation with a heat gun with poorly dried wallpaper is fraught with peeling at the joints. However, this is unlikely: between measuring and pulling the cut fabric, the usual temporary gap is at least a week. The walls will have time to dry well. Moreover, professionals don’t warm them,
- during installation, there is a chance of damaging the wallpaper. When sloppy work. No matter what work we do after wallpapering,
baguettes installed along the edge of the ceiling press the wallpaper. This makes wallpapering difficult in the following years.